 Lea
Lea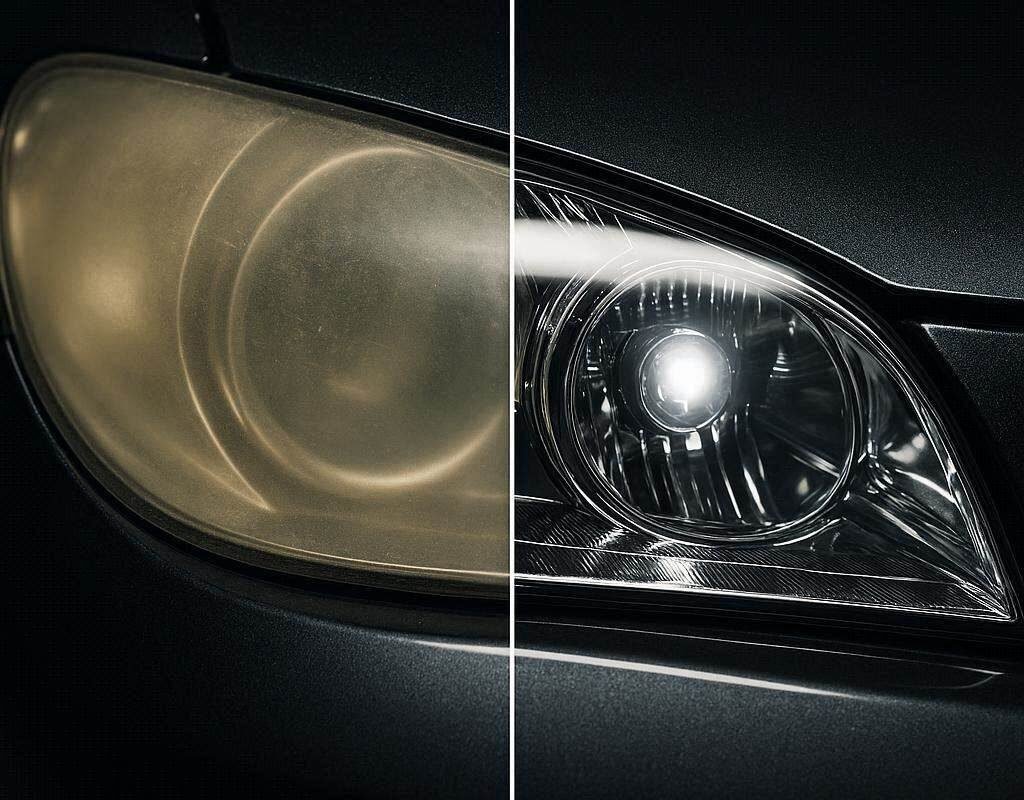
Driving at night requires maximum visibility to spot hazards, pedestrians, and road signs early. However, as cars age, one of the most neglected components is the headlight assembly. Over time, clear plastic headlight lenses gradually turn yellow, hazy, and cloudy, reducing light output by up to 80%.
Dim or oxidized headlights are not just an aesthetic issue; they are a major safety hazard for night driving. In this guide, we will explore why headlights become cloudy, how to restore clear vision using DIY methods at home, and additional tips to improve nighttime driving safety.
Why Do Car Headlights Turn Yellow and Cloudy?
Modern vehicles no longer use glass headlight lenses. Instead, manufacturers use polycarbonate plastic, which is lightweight, impact-resistant, and flexible. However, polycarbonate plastic has a major weakness: exposure to the elements.
Here are the main reasons your headlights degrade over time:
- UV Radiation: Sunlight contains ultraviolet (UV) rays that break down the protective clear coat applied to plastic lenses, causing oxidation and a yellowish tint.
- Road Debris and Pitting: Small stones, sand, and dirt thrown up by other vehicles create microscopic pits and scratches on the lens surface, trapping dirt and diffusing the light beam.
- Atmospheric Chemicals & Harsh Soap: Air pollution, industrial fallout, and aggressive car wash chemicals wear away the factory UV coating faster.
- Moisture Trapped Inside: Damaged rubber seals allow condensation to build up inside the headlight housing, creating a foggy appearance from within.
How to Restore Cloudy Headlights at Home (Step-by-Step DIY)
You don’t need to spend hundreds of dollars replacing entire headlight assemblies. If the oxidation is on the outside, you can easily restore clarity using a DIY restoration method.
Option 1: The Sanding & Polishing Method (Best for Heavy Oxidation)
Tools Needed:
- Masking tape
- Wet/dry sandpaper (1000, 2000, and 3000 grit)
- Plastic polishing compound (or rubbing compound)
- Microfiber towels
- Spray bottle with water mixed with a few drops of dish soap
- UV sealant or clear coat spray
Step 1: Prep and Protect
Wash the headlight lenses thoroughly with soap and water. Once dry, apply masking tape completely around the paintwork surrounding the headlight to protect your car’s paint from accidental sandpaper scratches.
Step 2: Wet Sanding
- Spray the lens and the 1000-grit sandpaper with your soapy water solution.
- Sand the lens using straight, horizontal motions with light pressure. Keep the surface wet at all times. You will see a milky residue coming off—this is the oxidized layer.
- Switch to 2000-grit sandpaper, spraying water continuously, and sand in vertical motions to smooth out scratches from the previous step.
- Finish with 3000-grit sandpaper in horizontal motions until the surface feels completely smooth.
Step 3: Polish for Crystal Clarity
Wipe the lens dry. Apply a dime-sized amount of plastic polish compound onto a microfiber towel (or a buffing wheel attached to a drill). Rub firmly in small circular motions until the haze disappears and the plastic becomes crystal clear.
Step 4: Apply UV Protection (Crucial Step!)
Without a new UV sealant, your headlights will yellow again within a few months. Apply a layer of automotive UV clear coat or ceramic headlight sealant according to the manufacturer’s instructions.
Option 2: The Toothpaste Quick Fix (Best for Light Oxidation)
If your headlights only have mild haze, standard white toothpaste (containing baking soda or micro-abrasives) acts as a quick, mild polish.
- Clean the headlight lens with water.
- Dab a generous amount of toothpaste onto a microfiber cloth.
- Rub the toothpaste firmly onto the lens in circular motions for 3–5 minutes.
- Rinse thoroughly with water and wipe dry.
Additional Tips for Safer Night Driving
Restoring your lens clarity is step one. To ensure optimal visibility during night trips, follow these extra maintenance checks:
- Check Bulb Alignment: Headlights can shift out of alignment over time due to potholes and bumps. Ensure both light beams are aimed correctly at the road ahead, not blinding oncoming drivers or pointing too low.
- Upgrade Old Halogen Bulbs: Halogen bulbs lose brightness as they age, even before burning out completely. Consider replacing aging pairs every 2–3 years or upgrading to high-efficiency LED options if compatible.
- Keep the Windshield Clean: A dirty inner or outer windshield creates glare from oncoming headlights. Clean windshield glass regularly with a streak-free glass cleaner.
Final Thoughts
Restoring cloudy headlights is one of the most rewarding and cost-effective DIY projects you can perform on your car. Spending less than an hour polishing your lenses significantly improves road visibility, enhances your car’s appearance, and ensures a safer driving experience for you and your passengers at night.